Wednesday, October 31, 2012

Halloween Photobooth!

At my Halloween party I set up a "photobooth" type thing! I put black wrapping paper all over one wall and put my camera on a tripod on the opposing wall. People took pictures all night! Such a great way to make taking pictures fun, and not tacky or forced. I think everyone had a good time with this. I had over 170 good photos taken. Memories for a lifetime. Here's just a few of my favorites!!!
(I was a Ringmaster) =^.^=


My Room


Just some pics of my room :) Floating book-shelves make an appearance! Also I love my pillows (even though I bought them).

Chevron Zipper Pouch


I hand sewed this cute little bag. I bought a 'natural' color 7" zipper and some printed duck canvas in gray and tan chevron. I watched a few youtube videos and then went at it. A little under two hours later and many hand stitches might I add, this little guy was finished! It's super sturdy and totally functional  You can't see any seams and the thread matches to top it off! I really love this thing. Cost under $5 to make too! It's currently holding some chapstick, headphones, my iPod, and mints :)

Crocheted Scarves

I made these scarves! They are all crocheted! Took me a few days for each one. I learned how to crochet from a video on Youtube on a Thursday and by Saturday I had the first one done! I caught on quick and now I'm a machine. :) 
Charcoal

Mustard

Rust

Gray

Fluorescent Salmon


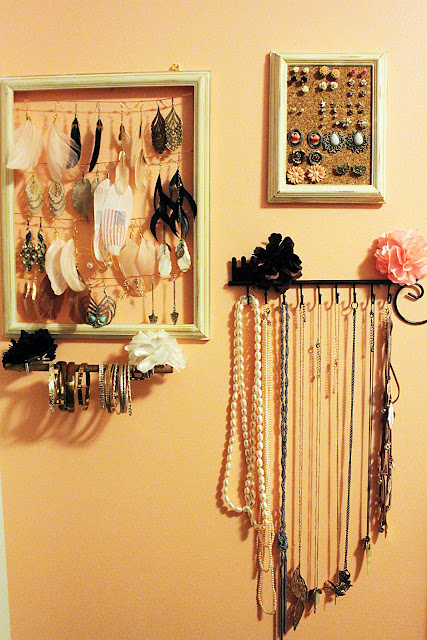
Pretty Jewelry Displays


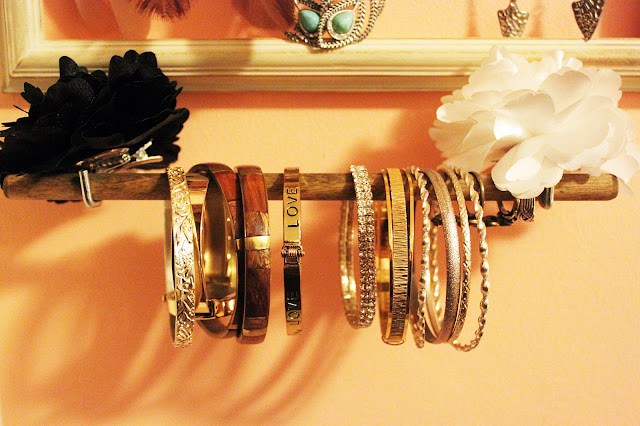
This is a bracelet/ring holder I made out of two center curtain rod hooks (that piece that braces the rod in the center if it is a long rod). I wanted a way to store my bracelets rather than having them strewn on my desk, in a box, or stacked on a stick! So I figured, let's make a rack. Figuring out how to make the dowel stand far enough away from the wall was tricky, but once I found these center rods- well, the rest is history.

This is my "dangly" earring holder. Its a big frame with faux burlap string stung across and secured by hot glue and super glue. The key here was making sure the string was taught. The frame is actually a white wooden frame I bought from Walmart. I wanted it to look antique, so I used an emery cloth to rough it up and then used my antiquing glaze. I love it!

This is my "stud" earring holder. It's a smaller frame, but the same kind, as the previous one. I used the same roughing up technique and then glued cork board sheets into the place the glass would normally go. Then I secured the back like you would with any other picture and hung it up! So convenient!!

Coat Rack

Me and my dad made this amazing coat rack. It was definitely the easiest project, since my dad helped so much... ;) I found this old piece of wood in the barn covered in dirt dust and, can you believe it, bird poop. My dad helped me cut it and we both decided that having it "tilted" was unique! Then I cleaned it off and stained it with an antiquing glaze. (Amazing color amirite?) Then I found these super cute wrought iron hooks on eBay for around $15. Then I went to the hardware store (no dad this time, just me at the store!) and got some screws that fit into the hooks and matched them as well! Proud moment. Then my dad screwd it all in and ta-dah! My awesome coat rack that will last me for a long time!

Sunburst Clock

I made this clock over the summer. I used a scrap of some sort of plastic-like material I scrounged for free at The Home Depot. I cut pieces of cardstock to the size I wanted and made sure they all laid flat together to make 360 degrees, a circle. Then I used scrapbook paper to make it pretty! Finally I tore apart a cheap clock from Walmart and used the mechanism inside for this clock. Mod podge Matte was my glue of choice!  Takes a few hours to make if you know what you are doing. I made one for a friend in one night's time. It's one of my favorite things in my room. Hangs right above my bed. :)

Pretty Photo Boards


Two (really it's five) picture boards I made over the summer. I took styrofoam boards and then took printed duck canvas material and hot glued the it around to the edges on the back of the boards. I then took ribbon and used pretty pearlized pins to secure it. They are super light but can hold so much stuff! I love them. The one on the top is in my living room and the one on the bottom is in my bedroom. <3

Stick Candle Holders


Made these little guys over the summer. I went outside and cut some branches off of a bush we have. I then glued them on using a hot glue gun to silver candle holders. Then I put some faux-electric candles inside and voila! Can't put real candles in them because the wood would catch fire. Haha, but they are beautiful on my little invisible book shelves!